Copper Collective
DIY copper candle holder centerpiece for wedding tablescape
I used copper piping for our wedding arch , and I’ve been trying to think of different ways I could reuse copper pipe, and then it came to me! An industrial candle holder centerpiece for a simple yet cool way to style your table setting. The styling options are endless, but if you're going for ultra modern and simple, it can absolutely stand alone. You could also use them on long tables with green garlands running length wise or set atop some pine branches for an elegant winter table scape. I’ve included the items needed to create along with DIY instructions with helpful photos to help guide you.

What You'll Need
Pipe Cutter
6 x elbows
5 x equal T’s
2 x 6 ft long, ½ inch width copper pipes cut down to sections below using pipe cutter
x 32.2 cm pipes (cut using pipe cutter)
4 x 4 cm pipes (cut using pipe cutter)
2 x 5 cm pipes (cut using pipe cutter)
2 x 8 cm pipes
2 x 13 cm pipes
Tips/Purchase Suggestions:
For the copper pipe and copper fittings, your best bet is to head to your home improvement store like Woodies in Ireland or Home Depot in the states. They have an entire aisle dedicated to piping. If you’re going at this alone, you’ll want to find a store associate to help with cutting the pipe down to the size you need, although it’s relatively easy once you get the hang of it. They usually have them there for free use, but if not, it's relatively inexpensive to buy one. Cutting the pipe in the store may be easier, as it will save a lot of space and time getting everything home, but if that’s not an option then just get what you need and head home to your creating space.
Step 1: O.I.Y- Organize It Yourself
I admittedly always skip this step and it always has the same end result, a mini tantrum and quick stroll around the block for a breather before returning and actually reading the directions. I’m telling you, get all the pieces out in front of you as seen here, broken out by section, and be one with the copper. This will set you up for success and fewer tantrums.
Section 1: The Base

Section 2: The Top

Step 2: All About That Base
Now that you're all organized, you're ready to start assembling!
1. Take one of the 32.2 cm pipes and 2 elbows and connect to one end of either elbow, repeat with other 32.2 cm pipe, then lay them parallel to each other

2. Take two 4 cm pipes and connect on either side of the equal T, then repeat with remaining two 4 cm pipes and equal T

3. Connect the equal T sections to the elbows vertically and make sure the T's are pointing up to the sky, and voila- you have your base.

4. Now go reward yourself with a couple sips of wine, or whatever your drink of choice may be
Step 3: To Top It All Off
1. Take two 5 cm pipes and one of the equal T's and connect both to both sides

2 Take the other two equal T's and connect to the other sides of the 5 cm pipes

3. Take the two 8 cm pipes and connect to the other ends of the equal T's

4. Take two elbows and connect to either end of the 8 cm pipes

5. Take twp 13 cm pipes and connect to end of elbows
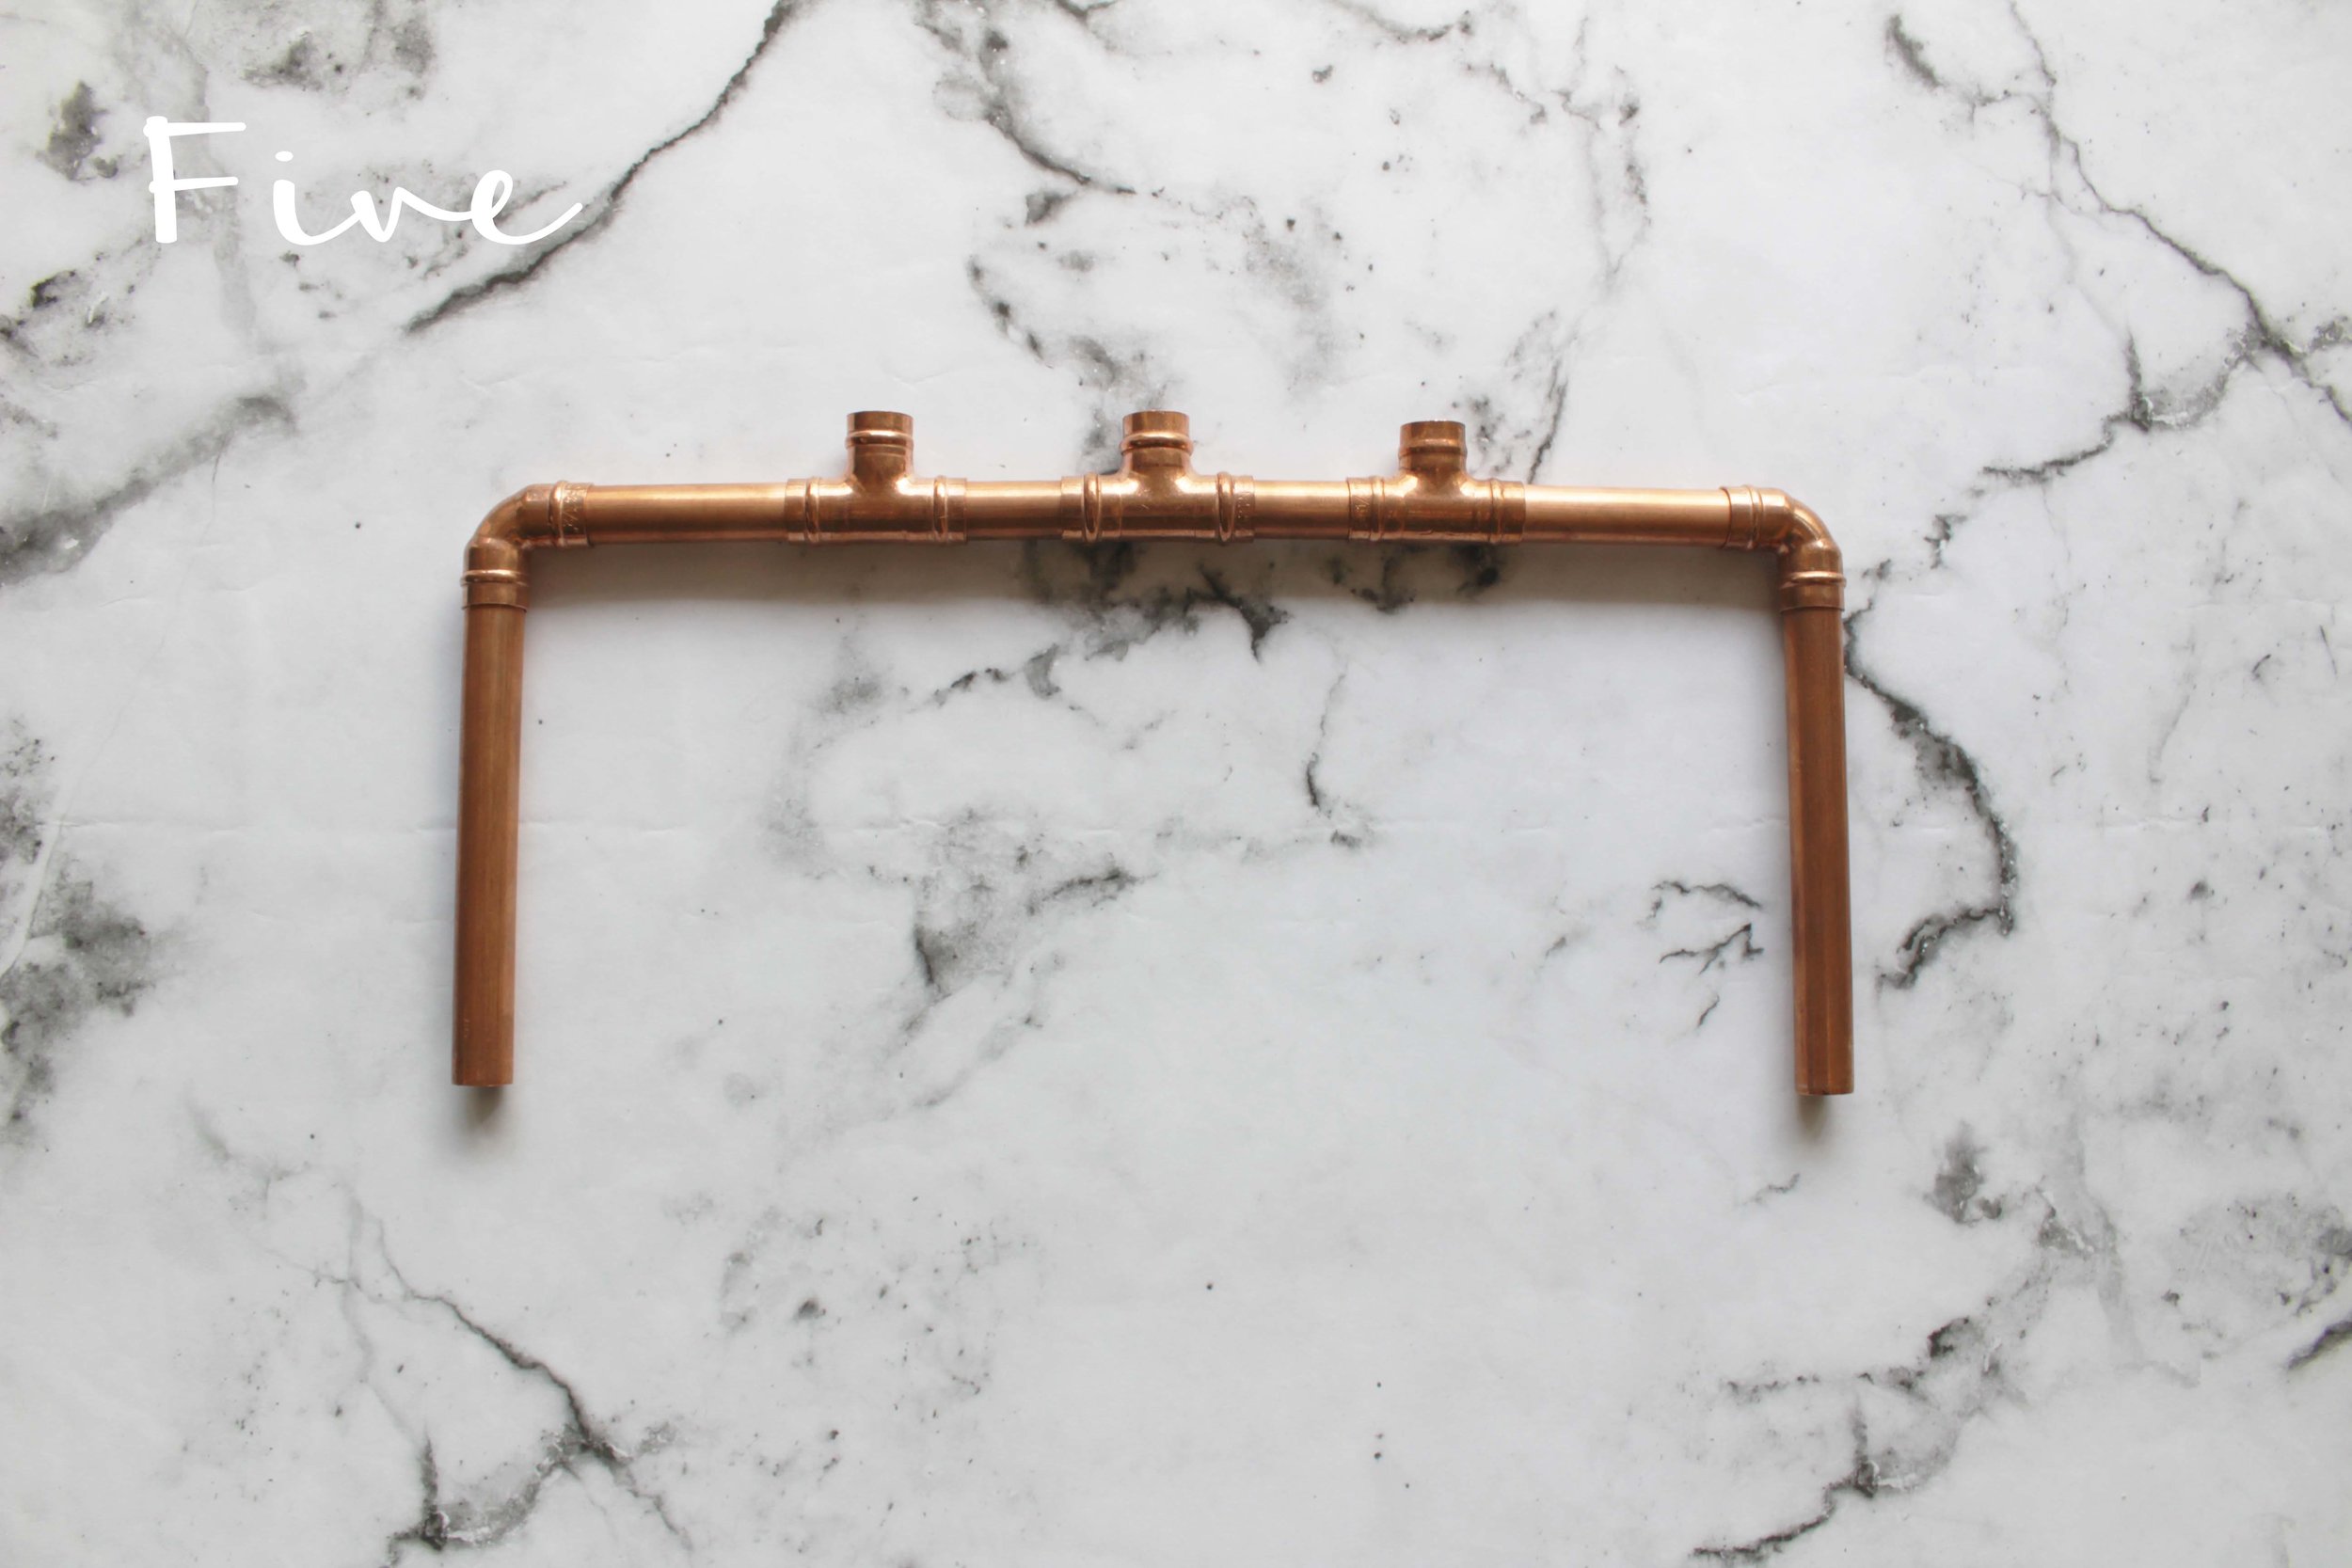
6. And there you have it, you've deserved a few more sips of that drink, but we have one more step.
Step 4: Let's Get Together, Yeah, Yeah, Yeah!
1. The equal T's from the base section should be pointed straight up
2.Take the top piece and connect the end of the 13 cm pipes to the equal T's

3. Take some time to squish the pipes and make sure everything is secure and pushed in all the way

4. Now go finish your glass, because you just made yourself a copper candle holder centerpiece!
Congrats, you should feel super accomplished! If you're using these on every table, you just have to make 6-8 more (or even more depending on table size and count), but this is where your family and friends come in. Send along these instructions to them and go have yourself the whole bottle!
Happy creating!